Is YesChef right for me?
Take this quiz to find out.
The Best Apple Pie Recipe
Written by the YesChef staff
Share on

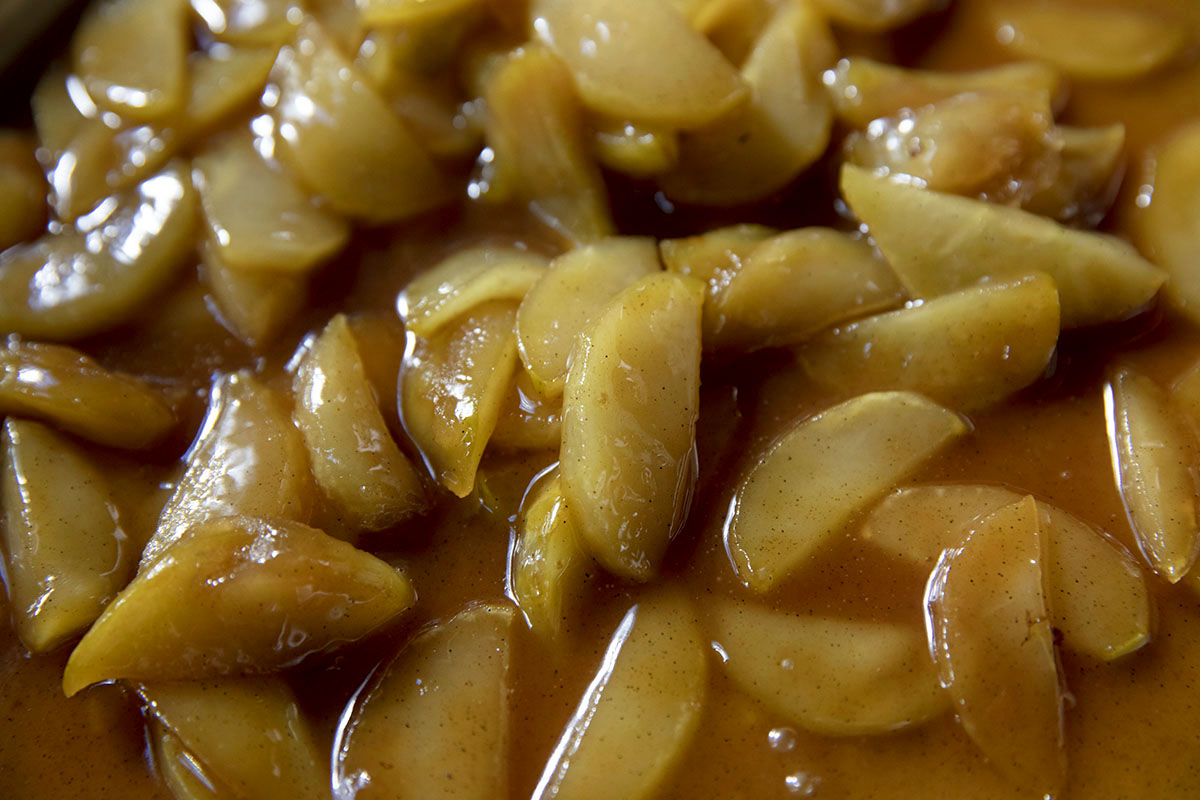
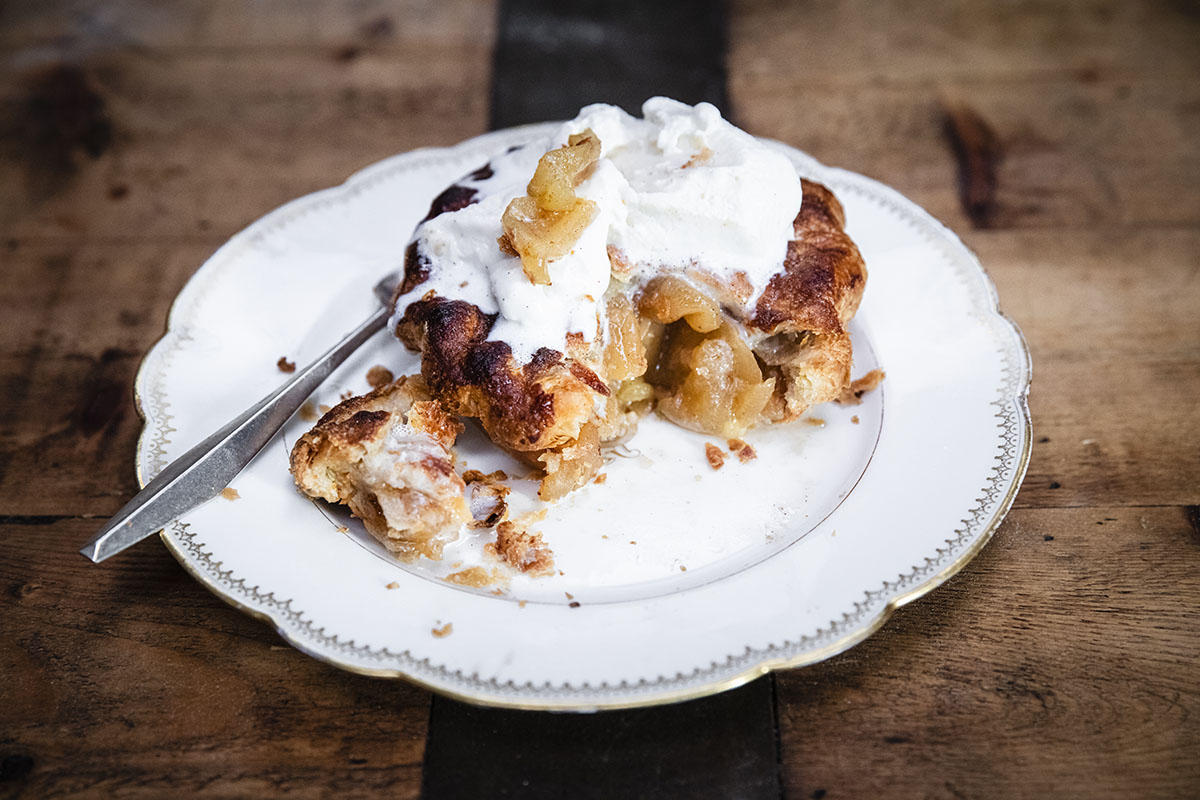
Learn how to make the best apple pie recipe, including an easy caramelized apple filling that creates a shiny, glossy, buttery finish with every apple slice still intact. It’s an impressive mile high pie in individual form.
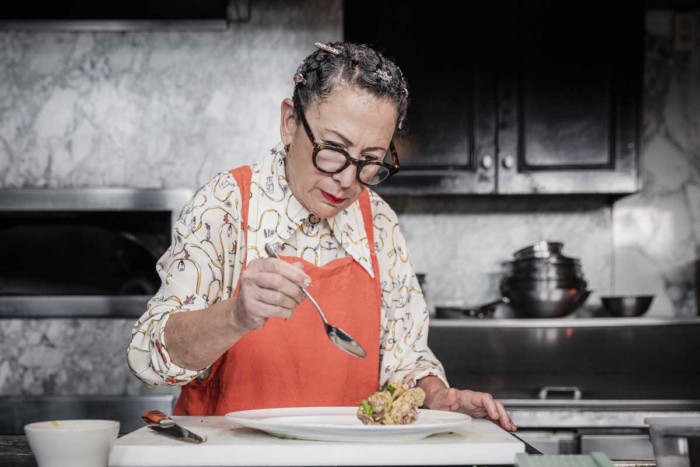
Chef Nancy Silverton astounds us with her homemade apple pie recipe in her YesChef class, Mom’s Apple Pie. It’s a sparkle-dusted dessert dream of cinnamon, sugar, caramel, and fresh apples wrapped around a thick, flaky, tender crust.
Oh, and did we mention there’s bourbon in the apple pie filling recipe, too?
Get Access to an Ever-Growing Library of Classes
Every Subscription includes:
- Unlimited Streaming of all Classes
- Watch on your phone, tablet or laptop
- Story-driven Classes, Practical Lessons
- Recipes with Step-by-Step Guidance
- 30-day Satisfaction Guarantee
- New Lessons added all the time
$9.99/mo
Billed annually

Best apples for apple pie
Chef Nancy Silverton likes Pippin apples, which are green, tart, juicy and not too dry. Granny Smith is the next best variety.
Since there is a hefty amount of sugar in the apple pie filling, the tartness of the apple is necessary to counter the sweetness of the sugar.
How to make apple pie
The method for making apple pie from scratch comes in a few parts – filling, dough, building and baking. Here’s how to do it:
Preparation time
Hands-on: 1 hour | Total: 12 hours
Serving size
5 Servings
Apple pie filling
Ingredients
- 6 pounds tart green apples
such as Pippin or Granny Smith - 2 cups granulated sugar
- 1 tablespoon cinnamon
ground - 1 pounds unsalted butter
(about 4 sticks) - 2 whole Vanilla bean pods
- 1/2 cup heavy cream
- 1 cup Southern Comfort
or Bourbon - 1 cup Bourbon
Gear
- Veggie peeler
- 2 large bowls
- Cutting board
- Chef’s knife
- Stainless steel tablespoon
- 14 inch sauté pan
or skillet - Butter knife
- Rubber spatula
- Sheet pan
Method
- To prepare the apple filling, peel tart green apples, and then cut them from top to bottom around the core to give you four slabs.
- Discard the cores and slice the apple pieces no thinner than ¼-inch thick.
- You should have about 5 quarts of sliced apples.
- Combine granulated sugar and ground cinnamon, stirring with a spoon until the cinnamon gets evenly distributed throughout the sugar.
- Reserve the cinnamon sugar to sprinkle on top of the assembled pies, the remainder used in the apple filling and set aside.
- To sauté the apples, heat a sauté pan with high sides over medium-high heat.
- Note: You will need to sauté the apples in 2 batches to prevent overcrowding of the pan and allow the natural fruit juices to release.
- Add butter to the pan and let it melt and bubble slightly but do not allow to brown.
- Using a paring knife, split the vanilla beans lengthwise.
- Use the back of the knife to scrape out the vanilla seeds and add a quarter to the melted butter, stirring to incorporate.
- Carefully add a quarter of the sliced apples to the pan in a single layer, cook and stir with a heatproof rubber spatula, swirling the pan, until the apples are tender but not brown, 6 to 8 minutes.
- Sprinkle a quarter of the cinnamon sugar evenly over the apples and toss to combine.
- Reduce to medium heat to prevent the sugar from burning.
- As the sugar melts and juice releases from the apples, a lot of liquid will collect in the pan.
- Continue stirring, tossing, and swirling the pan every so often to avoid scorching, until the juice has reduced to a thick syrup, and the apples are translucent and caramelized, but still firm to the touch, about 10 minutes.
- Pour in heavy cream and swirl the pan to incorporate.
- Increase to medium-high heat and simmer until the cream is reduced and the apples are shiny, about 5 minutes.
- Remove the pan from the heat for safety, and pour in a quarter of the Southern Comfort to flambé, allowing the alcohol to ignite and burn off.
- Continue to cook for an additional 2 minutes until reduced and thick.
- Spread the apples out on a baking sheet so they cool quickly and stop the cooking.
- Repeat the process by sautéing the remaining apples in three more batches, in the same manner, dividing the ingredients evenly.
- Transfer each batch of sautéed apples to the baking sheet and refrigerate, uncovered, until cold, 8 hours or up to overnight.
- You should have about 6 cups of sautéed apples.
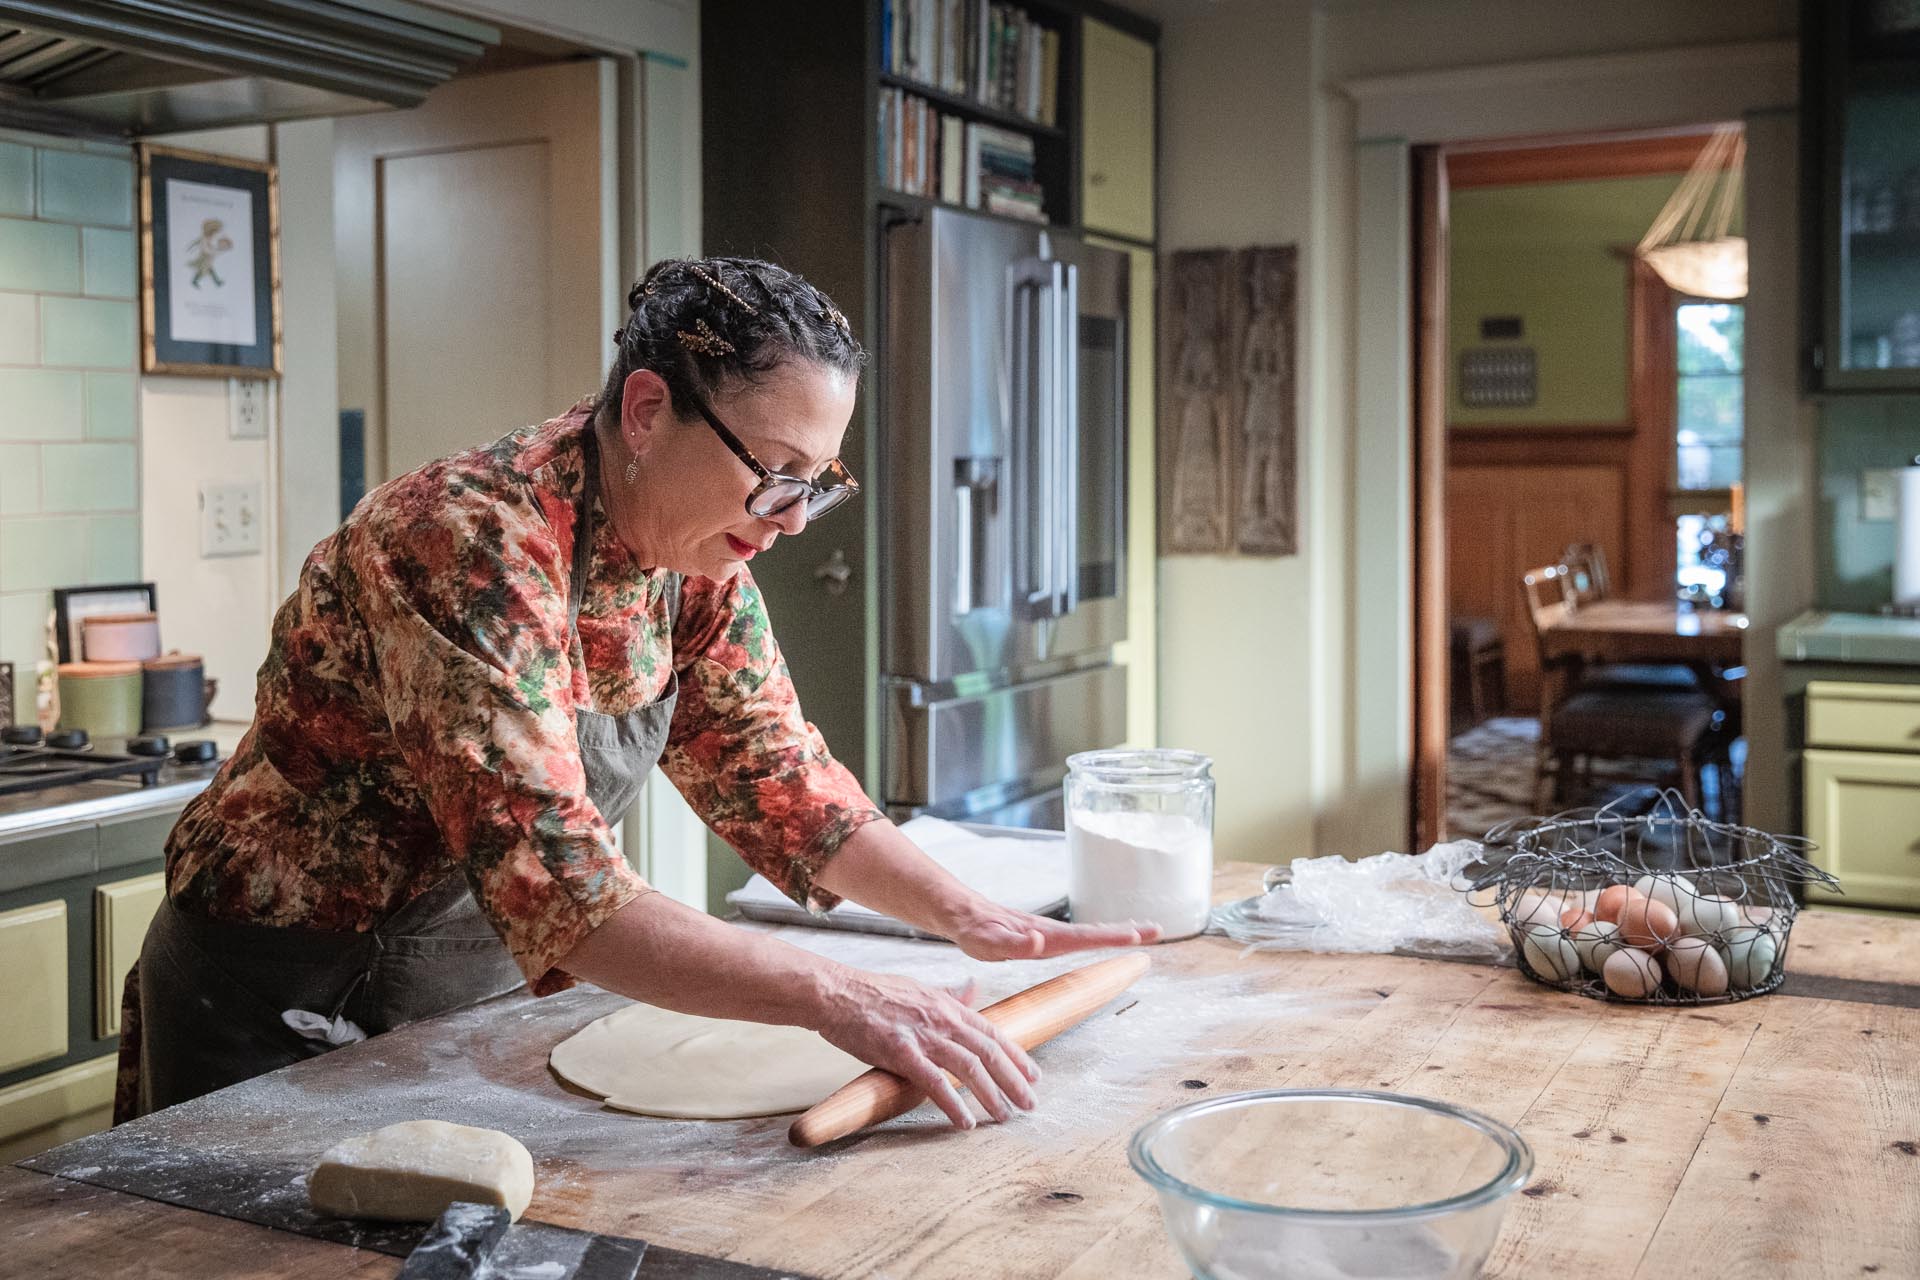
Pie Dough
Ingredients
- 4 cups unbleached all-purpose flour plus more for dusting
- 1 tablespoon kosher salt
- 1 unsalted butter (4 sticks) cut into 1-inch cubes and frozen for at least 1 hour
- 1/4 cup cold water plus more as needed
- 1/4 cup heavy cream
- Standing electric mixer (4 to 5 quarts) with a paddle attachment to make the dough
- Plastic wrap
- Rolling pin
- 1 large cutting board
- Dough scraper
- Parchment paper
- 6 inch appetizer plate or pastry ring
- Chef’s knife or kitchen shears
- To prepare the dough, combine unbleached all-purpose flour, kosher salt, and frozen butter cubes in the bowl of a standing electric mixer.
- Fit the mixer with the paddle attachment and mix on low speed until the flour and butter come together into pea-sized clumps.
- In a liquid measuring cup, stir together cold water, heavy cream, and pour a little at a time into the mixer.
- Continue to mix on low speed until the dough comes together, adding the rest of the liquid as needed.
- Lightly dust a large work surface with flour and set the dough on top.
- Repeat the process with the remaining ball of dough.
- Gather the dough together into a ball and cut it in half into 2 equal pieces (about 1 pound each).
- Using your palms or a rolling pin, pound each piece of dough into 2 round disks.
- Tightly wrap each disk separately in a plastic wrap and chill in the refrigerator until the dough is firm, at least 2 hours or up to overnight.
- To roll out the chilled dough, lightly dust your work surface with flour.
- Remove one disk of dough from the refrigerator, unwrap it, and place it on the floured surface.
- Cut the dough into large chunks and bring them together into a ball.
- Pound each chunk with a rolling pin to flatten and soften the dough.
- Dust the dough and rolling pin lightly with flour and roll it out, starting from the middle of the dough with a back and forth motion and stopping just before the rolling pin reaches the end of the dough.
- Rotate the dough a quarter turn and repeat, working your way around it until you have approximately a 10-inch circle about ¼-inch thick (the dough does not need to be perfect because it will get cut).
- Line a baking sheet with parchment paper and lightly dust with flour; gently transfer the rolled out dough to the prepared baking sheet.
- Refrigerate the dough on the baking sheet, 30 minutes to 1 hour to relax, which will make it easier to cut out for the individual crusts.
- To cut the dough out into the circles, remove the dough from the refrigerator, lightly dust the work surface with flour, and lay one of the rolled out dough pieces on top.
- Invert a 6-inch appetizer plate or pastry ring on top of the dough close to the edge.
- Trace around the circumference with the tip of a knife to cut out a 6-inch circle.
- Repeat two more times so you have three cut-out dough rounds.
- Put the rounds back on the parchment-lined baking sheet.
- Gather the dough scraps from the cut out dough and press into a ball.
- Dust the work surface, dough, and rolling pin with flour as needed, and roll out again as you did the first time.
- Cut out three more 6-inch circles and gently set them on the next layer of parchment in the baking sheet.
- Chill in the refrigerator while preparing the second disk of dough.
- Repeat the process as you did with the first disk; dusting, rolling, cutting, and layering in between flour-dusted pieces of parchment on the baking sheet.
- You should end up with at least twelve 6-inch dough rounds; chill them for 15 to 20 minutes to firm up.
Pie Build
Gear
- Chef’s knife or kitchen shears
- Pastry brush
- 6 metal pie pans
- To assemble the apple pies, remove the dough from the refrigerator and set out on the counter for a minute or 2 to soften slightly and prevent the dough from cracking when lining the pie pans.
- Set your pans out on the counter and brush the bottoms and sides with melted butter.
- Working with one pan at a time, gently place a round of dough in the prepared pan, centering it so that the dough overhangs evenly around the rim.
- Working your way around the pan, gently ease the dough into the creases of the bottom and sides of the pan and gently press without stretching it – you should have a bit of dough hanging over the rim of the pie pan.
- Fill the pans with chilled sautéed apples into a rounded mound.
- To put the top crust on the pie, wrap one dough round around the rolling pin and unravel it over the apples.
- Cup the dough with your hands to the inside edge of the pan to shape the filling into a nice rounded mound.
- Press the top and bottom crusts together to seal the pie so that the apple juices don’t leak during baking.
- With kitchen shears or a sharp knife, trim the excess dough around the edges of the pan, leaving about 1-inch of excess from the edge of the pie pan.
- Fold the top and bottom of the dough under itself to create a thick, sturdy wall around the pie.
- Repeat with the remaining ingredients to form the rest of the pies.
- To crimp the pies, press the tip of your index finger against the inside rim of the crust.
- At the same time, pinch around it with your index finger from the other hand from the outside to form a V crimp shape.
- Repeat following along the rim until the entire crust has a scalloped edge.
- When you’re finished, you can go back around and adjust any misshapen crimps as needed.
- Refrigerate the pies for at least 20 minutes to relax and firm up.
Pie bake
Ingredients:
- 2 large eggs
- Pastry brush
- Dessert plates
- Ice cream scoop
- To bake the pies, preheat the oven to 400°F.
- Place the individual apple pies on 2 baking sheets to make it easier to put in and pull out of the oven and also to catch any juices that may bubble over onto the oven floor.
- Whisk eggs and water in a small bowl to make an egg wash.
- Brush the tops and rims of the dough with the egg wash.
- Sprinkle the tops of the pies with the reserved cinnamon sugar (1 teaspoon each).
- Insert the tip of a paring knife into the center of each pie and twist to create a steam hole allowing it to escape.
- Cut four slits around the center hole, at 12 o’clock, 3 o’clock, 6 o’clock, and 9 o’clock.
- Then make four small slashes in between the bigger ones.
- Bake for 20 to 25 minutes, rotating the pans halfway through baking until the pies are evenly golden and bubbling.
- Set aside at room temperature to cool for 10 minutes.
- To serve, remove the pies from the individual pans, put each on dessert plates, and top with scoops of vanilla gelato or ice cream.
Serves:
|
Hands-on:
|
Total:
Ingredients
Recipe
Nancy Silverton
Multiple James Beard Award-winning chef, best-selling cookbook author, and the restaurateur behind Michelin-starred Mozza, a Los Angeles gastronomic institution.
One of America’s most influential chefs, Nancy is celebrated for her unwavering pursuit of making the most delicious food possible.

More Articles
Grilling Steak Time Chart – How to Know When Your Steak is Done
December 28, 2021
5 Easy Recipes for Busy Weeknights
May 10, 2023
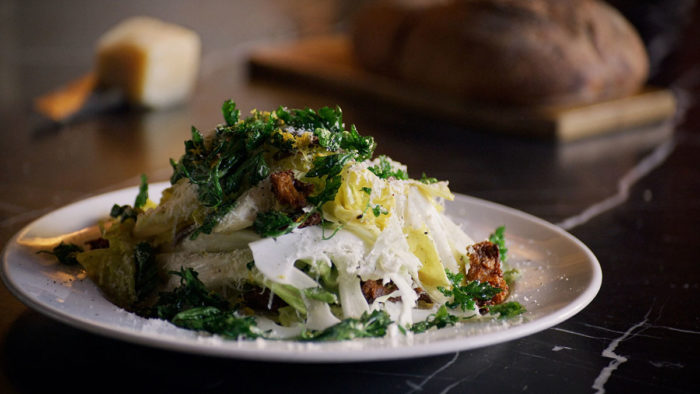
How to Make Nancy’s Famous Caesar Salad
February 1, 2023
5 Healthy Lunch Ideas From The World’s Greatest Chefs
April 10, 2023